The
DRSNews
May 2004
By
Subscription Only
Published
by Dave’s Repair Service, All Rights Reserved
In this issue:
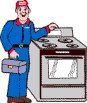
1) How to Convert Your Gas Range to LP
2) How to Replace Your Electric Range's Bake Element
1) Back in the March issue, we talked about gas dryers, both diagnosing
them when they don't heat and converting them from
Natural to LP gas.
I
thought I'd take a brief run at ranges this month, starting with
their conversion to LP.
(Note:
in most locales, gas ranges cannot legally be plumbed and
connected by homeowners, but they can be converted and adjusted
by a 'non-professional'. Please check your local codes on
this. And please - if you're at all uncomfortable doing any of
this, call in a pro. But watch what he does - it really isn't difficult!)
1)
New ranges ship from the factory already set up for natural gas.
There at least a couple of reasons for this:
a) A higher percentage of our population uses natural gas
b) It's easier to convert to LP than back from LP to natural
There
are basically two types of ranges to deal with: those with
sealed top burners, which are pretty much the standard today,
and the conventional, 'non-sealed' ones.
While
they operate in much the same way, their conversion is
usually different. There are still a few ranges that use adjustable
sealed burner orifices, but most are 'fixed' and must
be individually replaced to convert each burner from one
fuel to another.
(An orifice is simply a small brass fitting with a specifically sized
hole very accurately drilled through it, and, if adjustable, has
a provision to change the size of this hole by turning closed
a threaded portion).
Either
way, basically what you're doing when going from natural
gas to LP is changing to a smaller orifice to allow for the
higher pressure supplied by the 'bottled' gas (The available energy
in each ft of gas is different too, but for our purpose here
that's not important). Natural gas supplies typically run around
a pressure of 5.5 inches water column, while LP runs at
twice that pressure, averaging around 11 inches. The orifice through
which the gas travels to the burner must be smaller to accommodate
this difference.
Adjustable
orifices are simply 'snugged' down, clockwise, with a
1/2 inch open-end wrench, to convert them. Nearly all oven burners
use these too - more about that in a minute.
Fixed
orifices are replaced, and the good news is: the LP parts are
usually included with the new range. On some brands (GE being
one), the unused set is
attached to a storage point on the stove,
and this is a great idea. This way, they can't get lost, and if
you ever want to convert
back, there they are!
The
not-so-good news: these little top burner orifices very often require
a metric wrench to remove & install. And some can't be changed
without a very slender wrench or nut driver.
A very
useful tip I picked up many years ago: to hold that little orifice
in a regular nut driver or socket, tear a very small piece of
paper towel, hold it over the open socket, then push the orifice into
the socket. The paper does a great job of holding the orifice into
the wrench, preventing its being dropped into the 'innards' of the
range.
The
installation instructions that come with your range will usually
be pretty clear on which orifices go into each burner head. Many
new cook tops use as many as three different sized burners, each
with a different BTU rating and orifice size. I usually start by
laying the correct orifice beside its corresponding burner, just to
be sure I get them right the first time. Again, the instructions should
be clear on this. Some use a color code system, while others use
size numbers. (Note to manufacturers: here's
another area that
needs a standardized system)
One
detail that's commonly overlooked on these is the simmer settings.
Each top burner valve has a small screw inside its shaft that
can be adjusted to provide a low simmer. This adjustment must
be made on each burner once the range has been converted, or
'simmer' settings will be
far too high to be useful.
A
small-bladed screwdriver is needed for most of these. If you can't
find one small enough, it's possible to grind one down to
fit. I've noticed some of the most recent ranges are using a larger
screw that's a lot easier to access, and that's a welcome change.
That
should help get you through the top burner conversion. Not as
hard as it sounds, and stay with us -the rest is much easier.
First
convert the regulator. This is the part to which the inlet connects.
Remove the vent cap, flip the insert over and
reinsert it
(You'll usually see 'NAT' on one side and 'LP' on the
other). Reinstall
the cap, and that's done.
Then,
find the brass orifice that supplies the bake burner (usually under
the range, behind the drawer), and if included, the broil burner
(usually inside the oven). These are adjustable, and, like adjustable
top burners, are simply 'snugged' down clockwise with a
1/2 inch wrench.
Then
turn the oven on, keeping in mind that it may take up to 2 minutes
for ignition to occur. Watch the burner flame. If, after burning
for a minute or so, it pulls noisily away from the burner, it's
getting too much primary air. Simply loosen the screw on the air
shutter, where you just turned down the orifice, and close this shutter
down a bit to reduce air into the mixture. If the flame is yellow-tipped
and appears 'soft' (you'll know if you see it), open the
shutter a bit to increase air into the mix. This adjustment isn't critical,
and will rarely have to be done. But you should now about it.
Again, the instructions should mention this.
Congratulations!
Your new stove's flames should be a cheerful, even
blue, and you just saved yourself some serious money.
2) Not to neglect electric
range owners <grin>, here are a few tips on replacing that burnt out bake
element in your oven. These will usually - not always - be obviously
burnt out. I've seen cases where the burnout was wild enough to melt a
hole right through the oven liner. Yikes!
First, power down the range.
On most ovens, one of the bake element leads will be 'hot' with respect to
ground, and can provide an unpleasant surprise if you're pulling it
out still powered-up.
If your oven door comes off -
and most do today - pull it. Makes this job much easier.
Years ago, most bake elements
simply unplugged, and you took the old one to your local, corner appliance store (anybody remember those?), picked up a new one,
and plugged it in. Early ones that used open Nichrome coils could even be
re-wired back in the 50's.
These
days, unless your oven uses one of the new 'hidden' bake elements, there are usually two screws holding the element to the
back wall of the oven liner. Remove these and carefully pull the unit
out. In most cases there's (just) enough wire to pull the terminals free of
the back wall and disconnect them. If not, you'll have to pull the range
out and access the wires from the back.
On most later ranges, the
terminals are quick-disconnect, and this can be a good thing. If your
originals are at all burnt or damaged be sure and replace them, using only
nickle-plated, high-temperature terminals.
Also be certain they're
crimped properly, and not just squeezed flat.
Note:
I've used the Vaco 1900 crimping tool for years, and it makes a lasting repair,
nicely 'dimple-crimping' terminals. It's really tough to find one anywhere these
days, though, since they've been discontinued.
On
elements using screw terminals, be sure to support the terminal with a
pliers as you tighten the screws.
Once
the terminals are tight, just bolt it back in. Power up and set it to bake,
being sure the new element has no 'hot spots' (glowing a lot more than
the rest of the element). You're done!
***
If you have any topics you’d like to see discussed here or covered in an online article, let me know and I’ll do my best to oblige. The website is a resource I'm excited about, because it allows a lot more flexibility and detail than email. It's a lot easier, for example, to use photos to illustrate something in a web document than via email.
And thanks for all your encouragement - I really appreciate it! May the
Lord richly bless you & yours!
Warmly,
Dave Harnish
Dave’s Repair Service
New Albany, PA
drs@sosbbs.com
www.DavesRepair.com
"Success isn't the result of spontaneous combustion. You
must set yourself on fire." - R. Leach
Exodus 20:11
|